
DIY Wedding Flower Arch
- Shelby Burr
- Jul 11, 2022
- 3 min read


I just made my first flower arch for my sisters wedding and I wanted to share how I did it, what I bought, some tips and tricks and do's and don'ts of the trade. My hope is that you'll take this one thing away from my post: Anyone can do this. Yes, that includes you.
This flower arch took, roughly, two hours total. There were some impromptu runs to Hobby Lobby, but I would still count it all as two hours total for the building process.
Okay, let's start . . .
Here's what you'll need:
- Wire Cutters
- Scissors
- Fake flowers (We mainly went to Hobby Lobby during their 50% off sale and then we bought a few online from amazon)
- An arch or back drop for the flowers
*The arch itself was already provided for me, BUT here are some affordable and cute/boho arches I found on Amazon:
Step-by-Step Process
My first recommendation before you start is to build this 2-3 days before the wedding day. It will relieve some stress and you'll have time to run to the store (for more flowers if you need it) without having any kind of pressure on time.
Step 1: Layout all of your flowers and sort them by type. This will help you when going back and forth picking up different
Step 2: Attach floral cage with zip ties to the arch. I placed the floral cages next to one another to fill the space of the arch. Do what's best for you and your arch! Just make sure everything is secure–assuming that you might be moving the arch on the wedding day.
Step 3: Begin filling the cage with greenery first. Start by adding in the opposite corners of the floral cage so that they mirror each other. This is your base color, so fill as much or as little as you want with the greenery!
Step 4: Begin to add flowers. I started with the whites first. We wanted it to mainly be white and green for the base, and then sprinkle in colors later.
You can watch my quick time lapse video to get an idea!
Big shoutout to my Mother-in-love, Kimberly, for helping me with this! Walter (my toddler) was with us, so we tagged team playing with him and filling the arch. I also recommend creating this in a cool space. We were outside in 95 degree weather - lots of sweat and lots of water.
Steps 5: Continue to add flowers until the cages are full and the arch is starting to take form.
Step 6: I would recommend adding longer pieces that will stick farther out from the rest of the flowers. It will bring in a lot of depth and dimension if you have pieces closer to the arch and pieces that are farther away / sticking out.
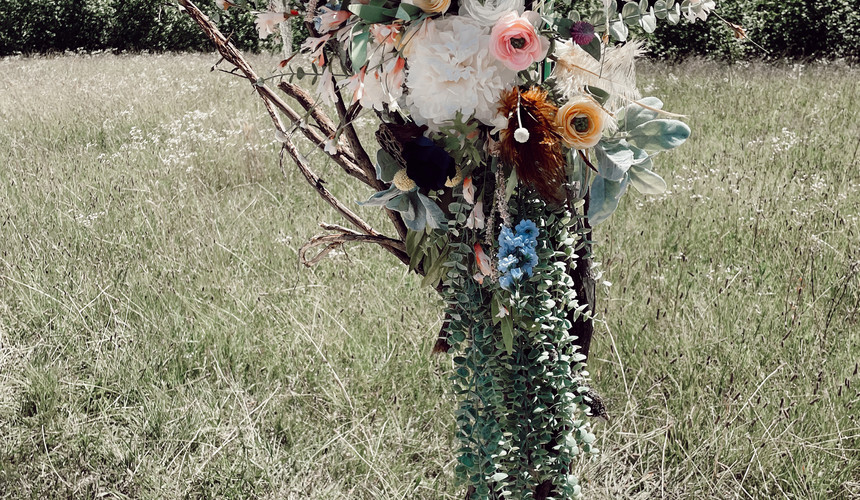
Here is a reference photo!

We have Billy Balls, wheat, long pieces of eucalyptus, small mushroom like flowers, and even feathers. These had longer stems and we didn't clip them as short as the rest. Plus, there was a light breeze that made them dance in the wind a little. The movement was everything.
Step 7: Last and final step! Continue to fill. Ha, that easy. If you see any empty spaces, just add a little more here and there.
Step 8: I lied, there is one last step. Pat yourself on the back. You did it!
It really is that simple. One recommendation is to ensure that everything is secure. Zip ties are your friend and use them to strap down any flowers that might fall, or any loose areas in the arch. I'm assuming you'll have to move the arch the day of the wedding, so be sure everything is secure! And if it falls out, no big deal. We had some pieces fall after we moved the arch, but we just popped them right back in. That's it! Have fun and be sure to take photos of your masterpiece.
Here are some more photos!


Comments